
Let your gate
start to remember you
Same gate, same motor, same remote — you don't have to change a thing. We just add one small box, and your home can start opening the gate for you through LINE.
For now, opening through LINE works on iPhone (iOS) first — Android is on the way. If you're on Android but want to start right away, there's another route: a small box that works over your home Wi-Fi (we'll post that method soon).
The Shelly box is an "electric finger" that presses the same button your remote presses — except you can trigger it from your phone. The rest is just detail.
This guide is in 4 phases: wire it up → grab the script from LINE → configure the box → come back and use it in LINE
What to buy / have on hand
Wire it into your existing board
No phone needed in this phase — cut the power first, then wire it up.
Cut the power first — do not skip this
Flip down the gate motor's breaker, then try the remote. If the gate doesn't move at all, the power is really off.
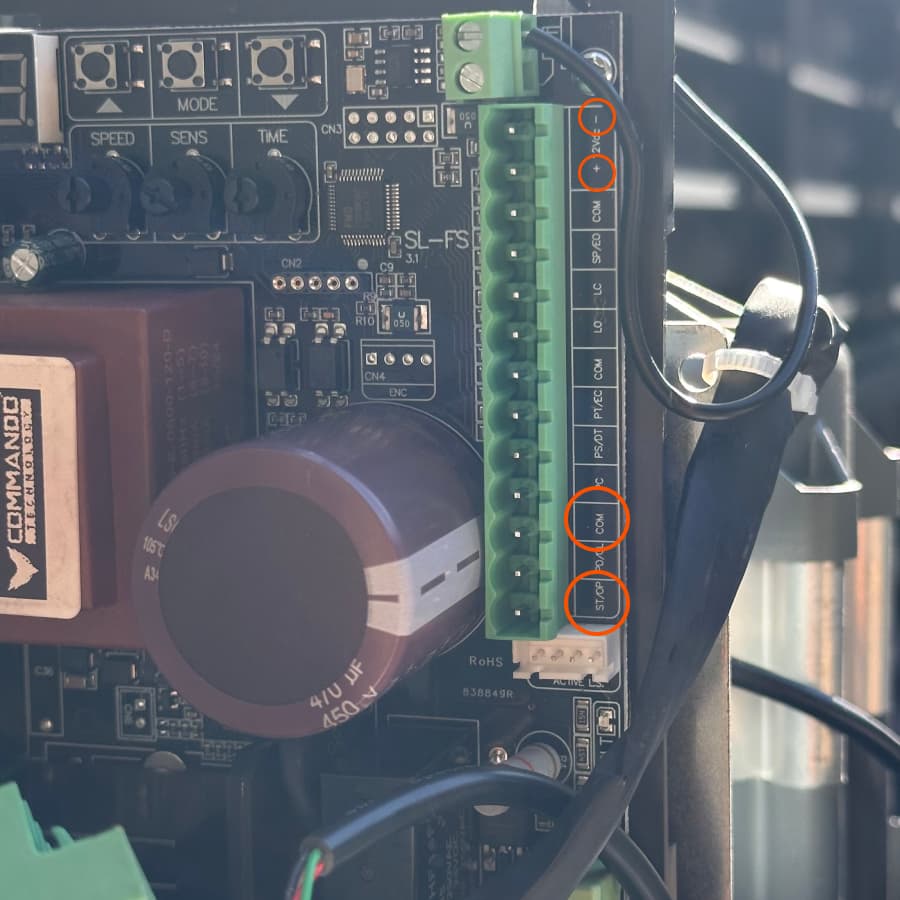
Find the open-gate trigger on the board
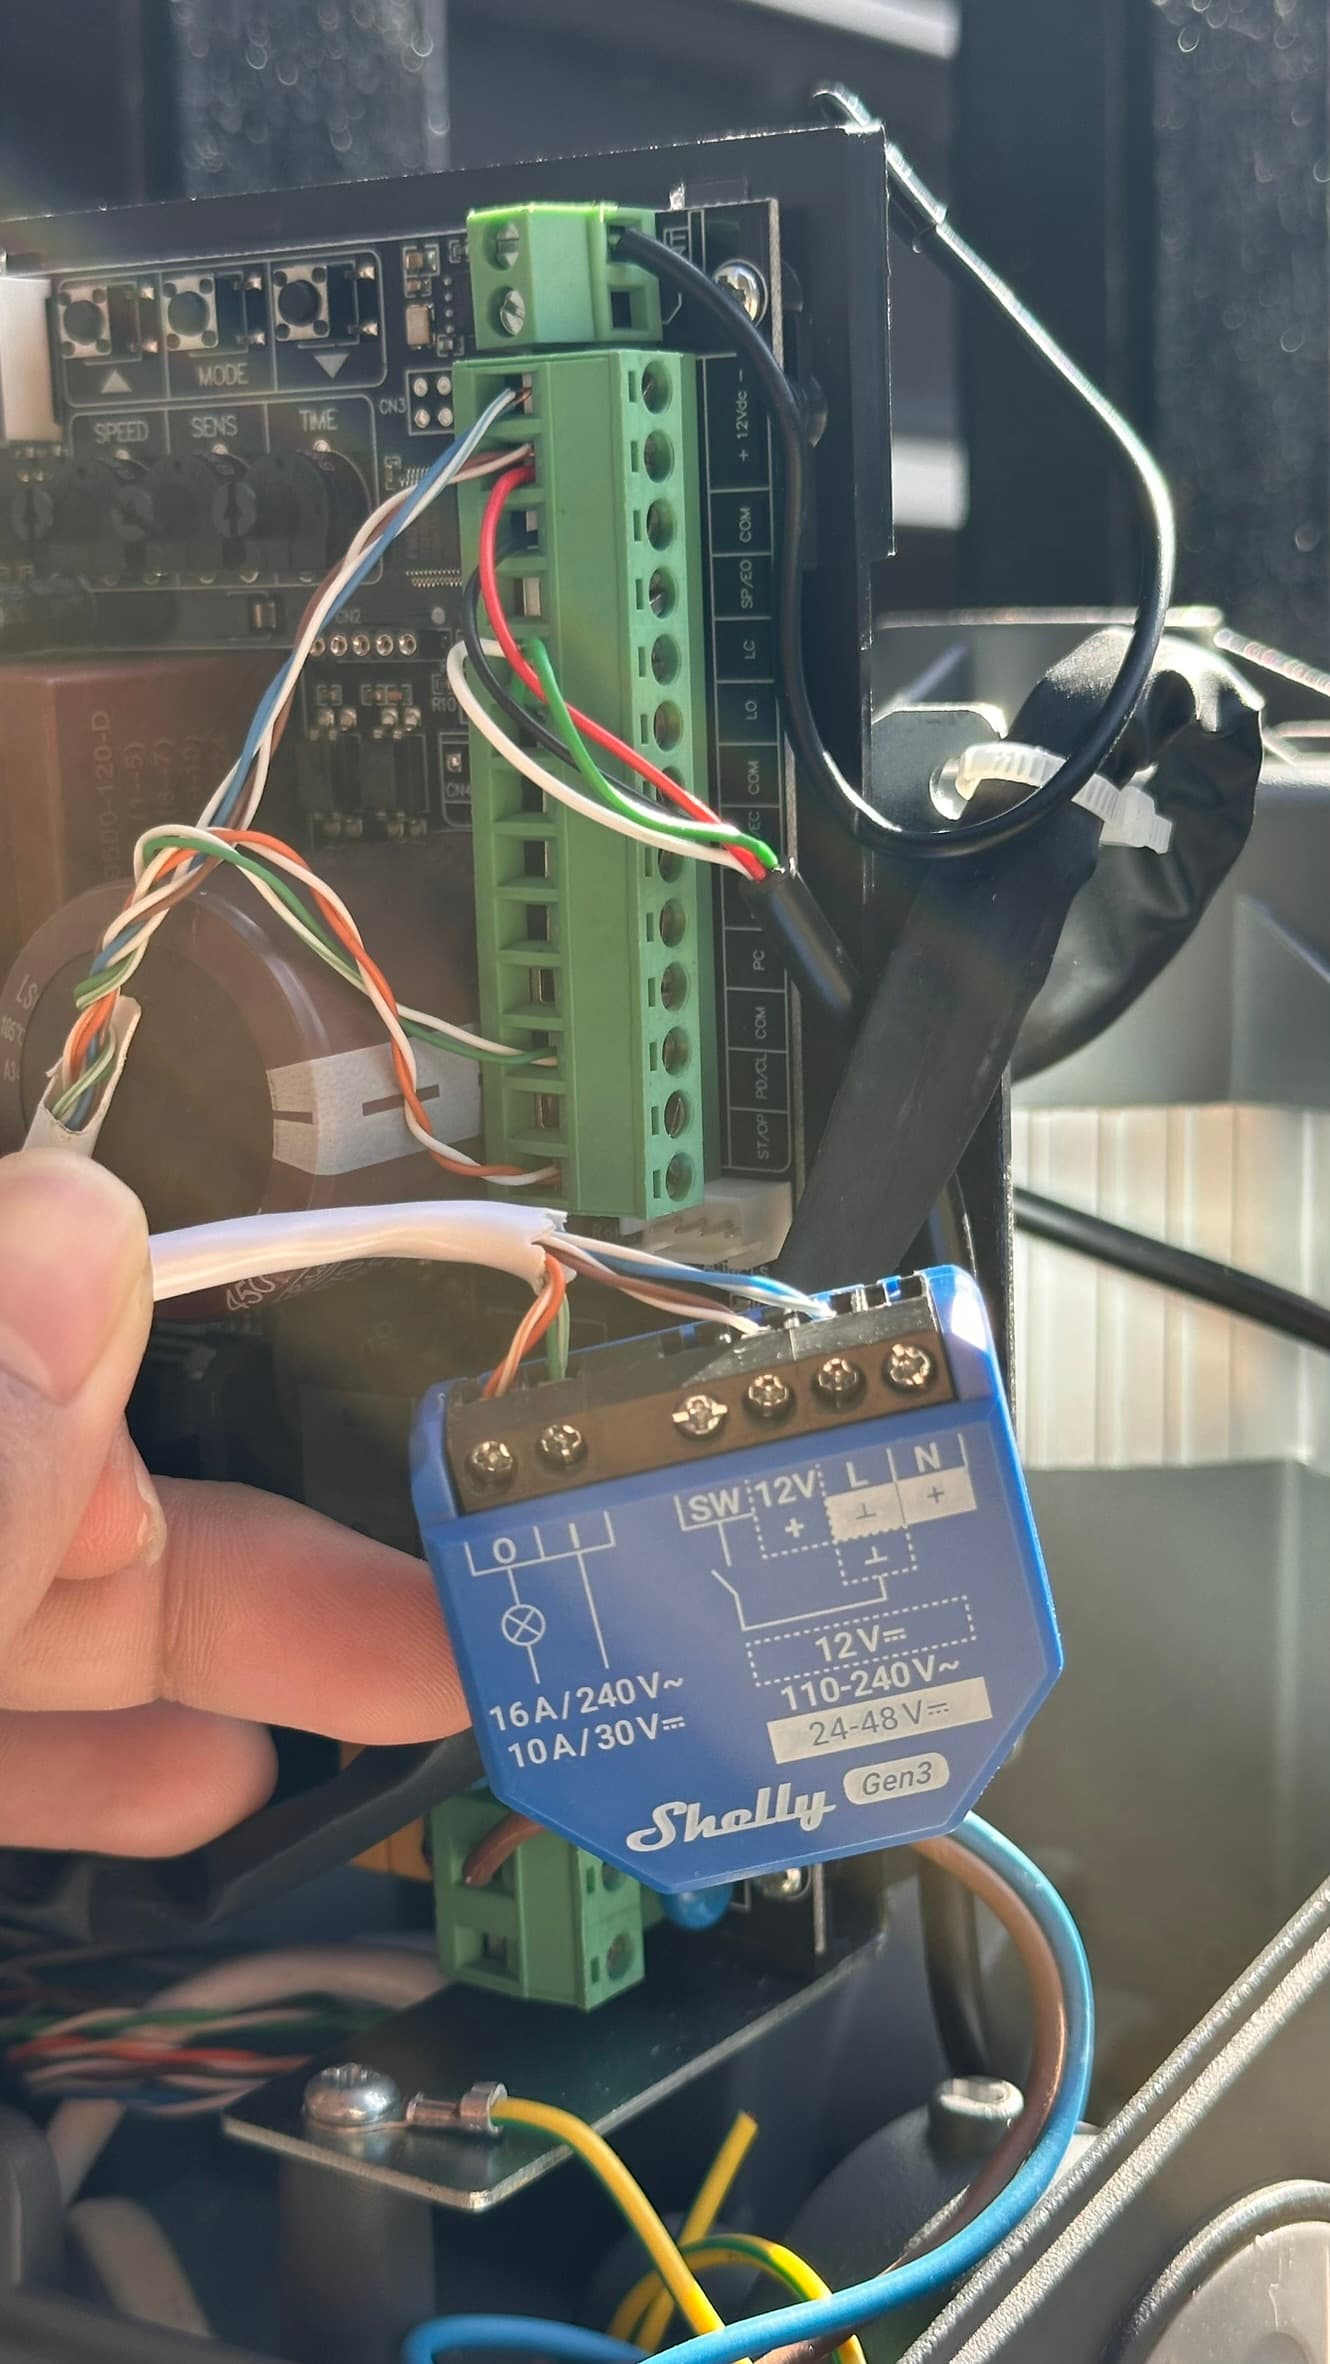
Open the control box cover and look for a terminal labeled ST/OP or PUSH paired with COM/GND — this is what the remote uses to trigger the gate open.
Power supply — which one applies to you?
It's not about "which way is best", it's about "what your board gives you to work with" — open it up and look first, like a doctor asking your symptoms before prescribing.
If you're not confident around 220V mains, just skip to route 3 (have an electrician help) — there's no shame in it. The wiring takes only 5 minutes, and you can do all the HomeLog setup yourself.
If you open the board and find a +12Vdc − terminal (often on boards with a built-in backup battery) — you're in luck. No need to touch 220V at all; just run a short jumper.
The N terminal is unused · on some boards the negative is labeled GND/COM — same thing
Most boards have no DC to draw from — use the mains power at the board's input (POWER IN). This works for almost everyone.
The 12V terminal is unused
Or hand this guide to an electrician, or to someone close to you, and have them wire the power for you following this guide — just the part that involves the gate motor (this step 3 only). Then you carry on with the rest yourself.
Some boards have a 24V AC terminal — never wire it into the Shelly
Even though Shelly says it supports 24-48V, that means 24-48V DC (direct current) only, not alternating current — if your board only has 24V AC, use 220V mains (route 2) instead.
Wire the open-gate trigger
This pair carries no power — it just "touches together to complete the circuit", like pressing the remote — so it's fine if you swap them.
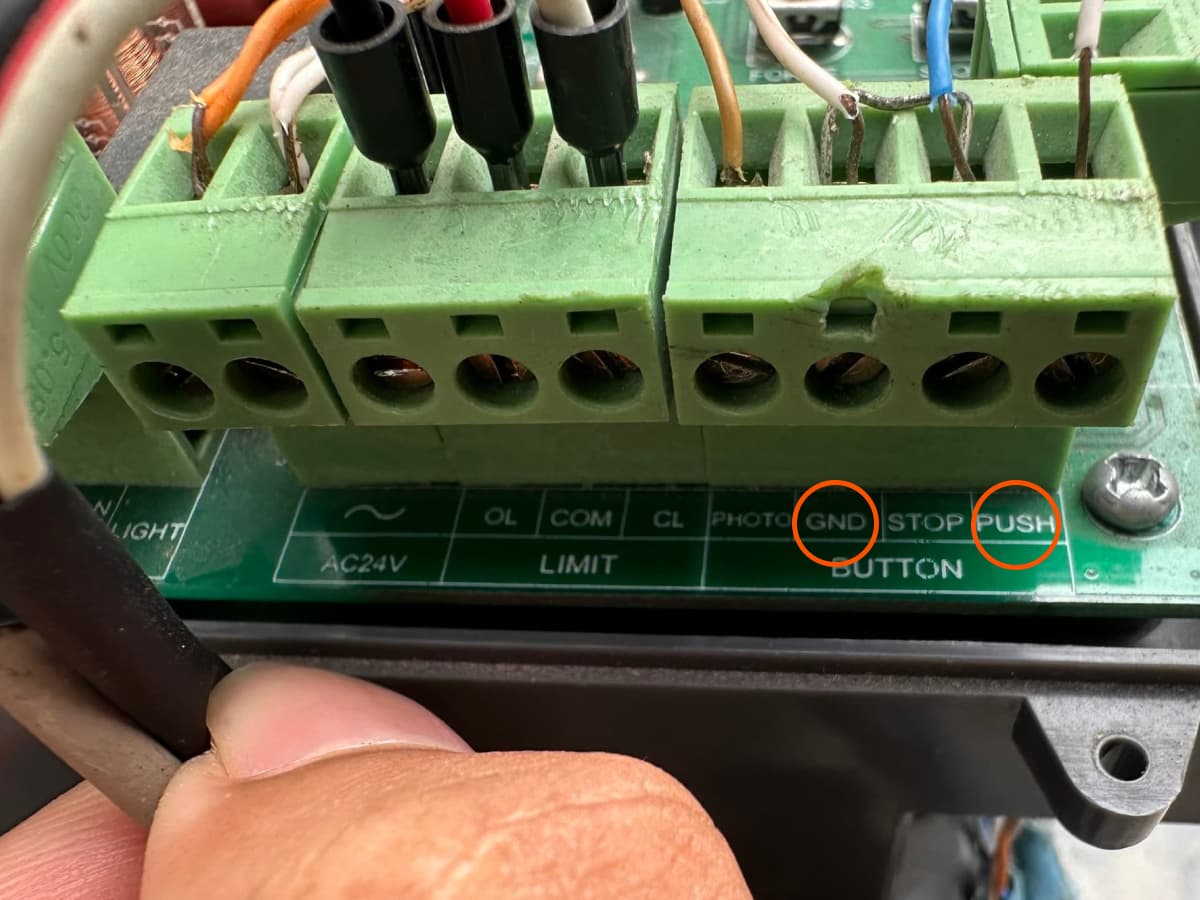
Your board doesn't look like the one in this guide?
The terminal names vary by brand, but the job is the same — just match by function and you're good.
PED = Pedestrian — it opens the gate only a crack for a person to slip through, not full open, so a car can't get in.
If you accidentally wire to PED → every time you trigger it the gate barely opens → you'll think it's broken even though it's wired tight · to open fully, wire to PUSH/START/ST/OP
Some boards (those with a separate STOP button) need STOP to be kept in a closed circuit at all times for the gate to work.
Symptom: the Shelly is fully wired, power is fine, but when you trigger it the gate stays dead still → check whether the board has a jumper wire across STOP–COM/GND · the COMMANDO board in this guide doesn't need a jumper.
Grab the "script" from LINE first
Do this now, while your phone is still on home internet — because next we'll connect to the Shelly's own Wi-Fi, which has no internet for a moment, so LINE won't load.
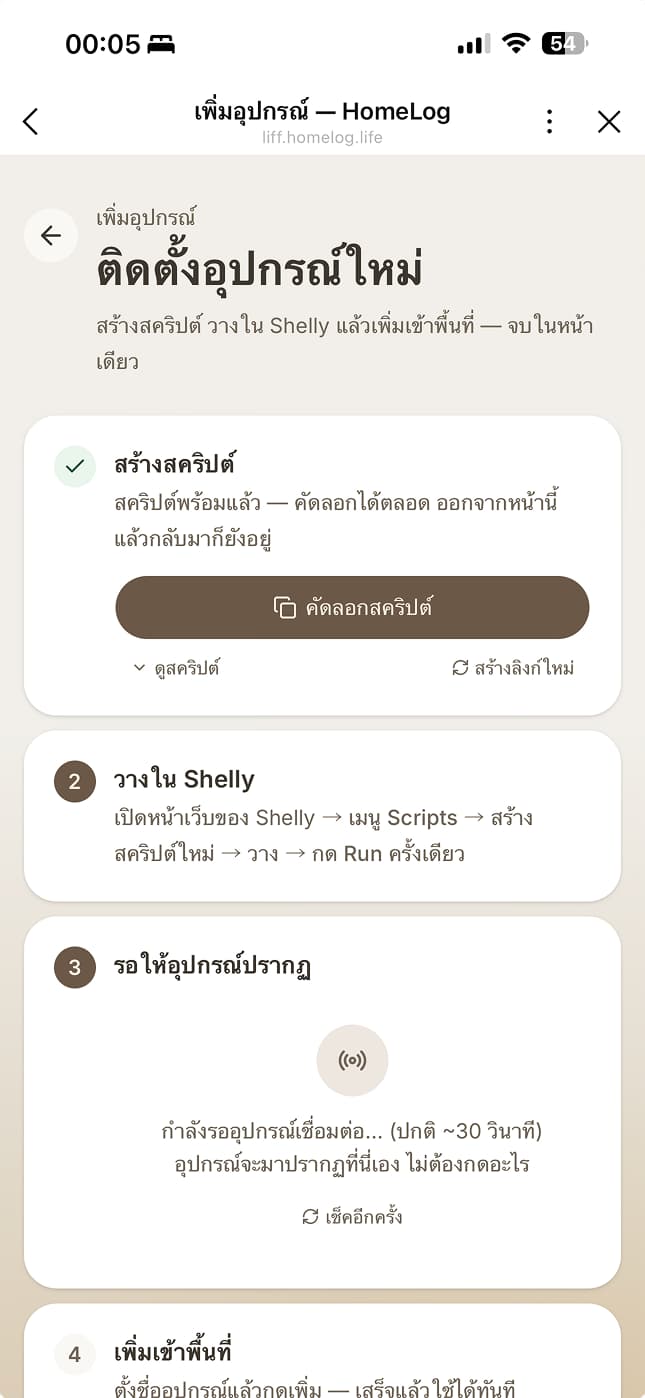
Create a space, then copy the script
Add HomeLog on LINE, then:
→ Create a new space (e.g. "Home" or your shop name)
→ Add a device → tap Copy script
→ the script is saved to your phone's clipboard, ready to paste
Set up the Shelly — all in one place
Now we do all the setup through the Shelly's web page at 192.168.33.1 — no app to download, no IP to hunt for.
Open the Shelly's settings page
Flip the breaker back up → connect your phone to the Wi-Fi named Shelly1… → open a browser and type 192.168.33.1
This address always works on any device, even right at the gate with no internet.
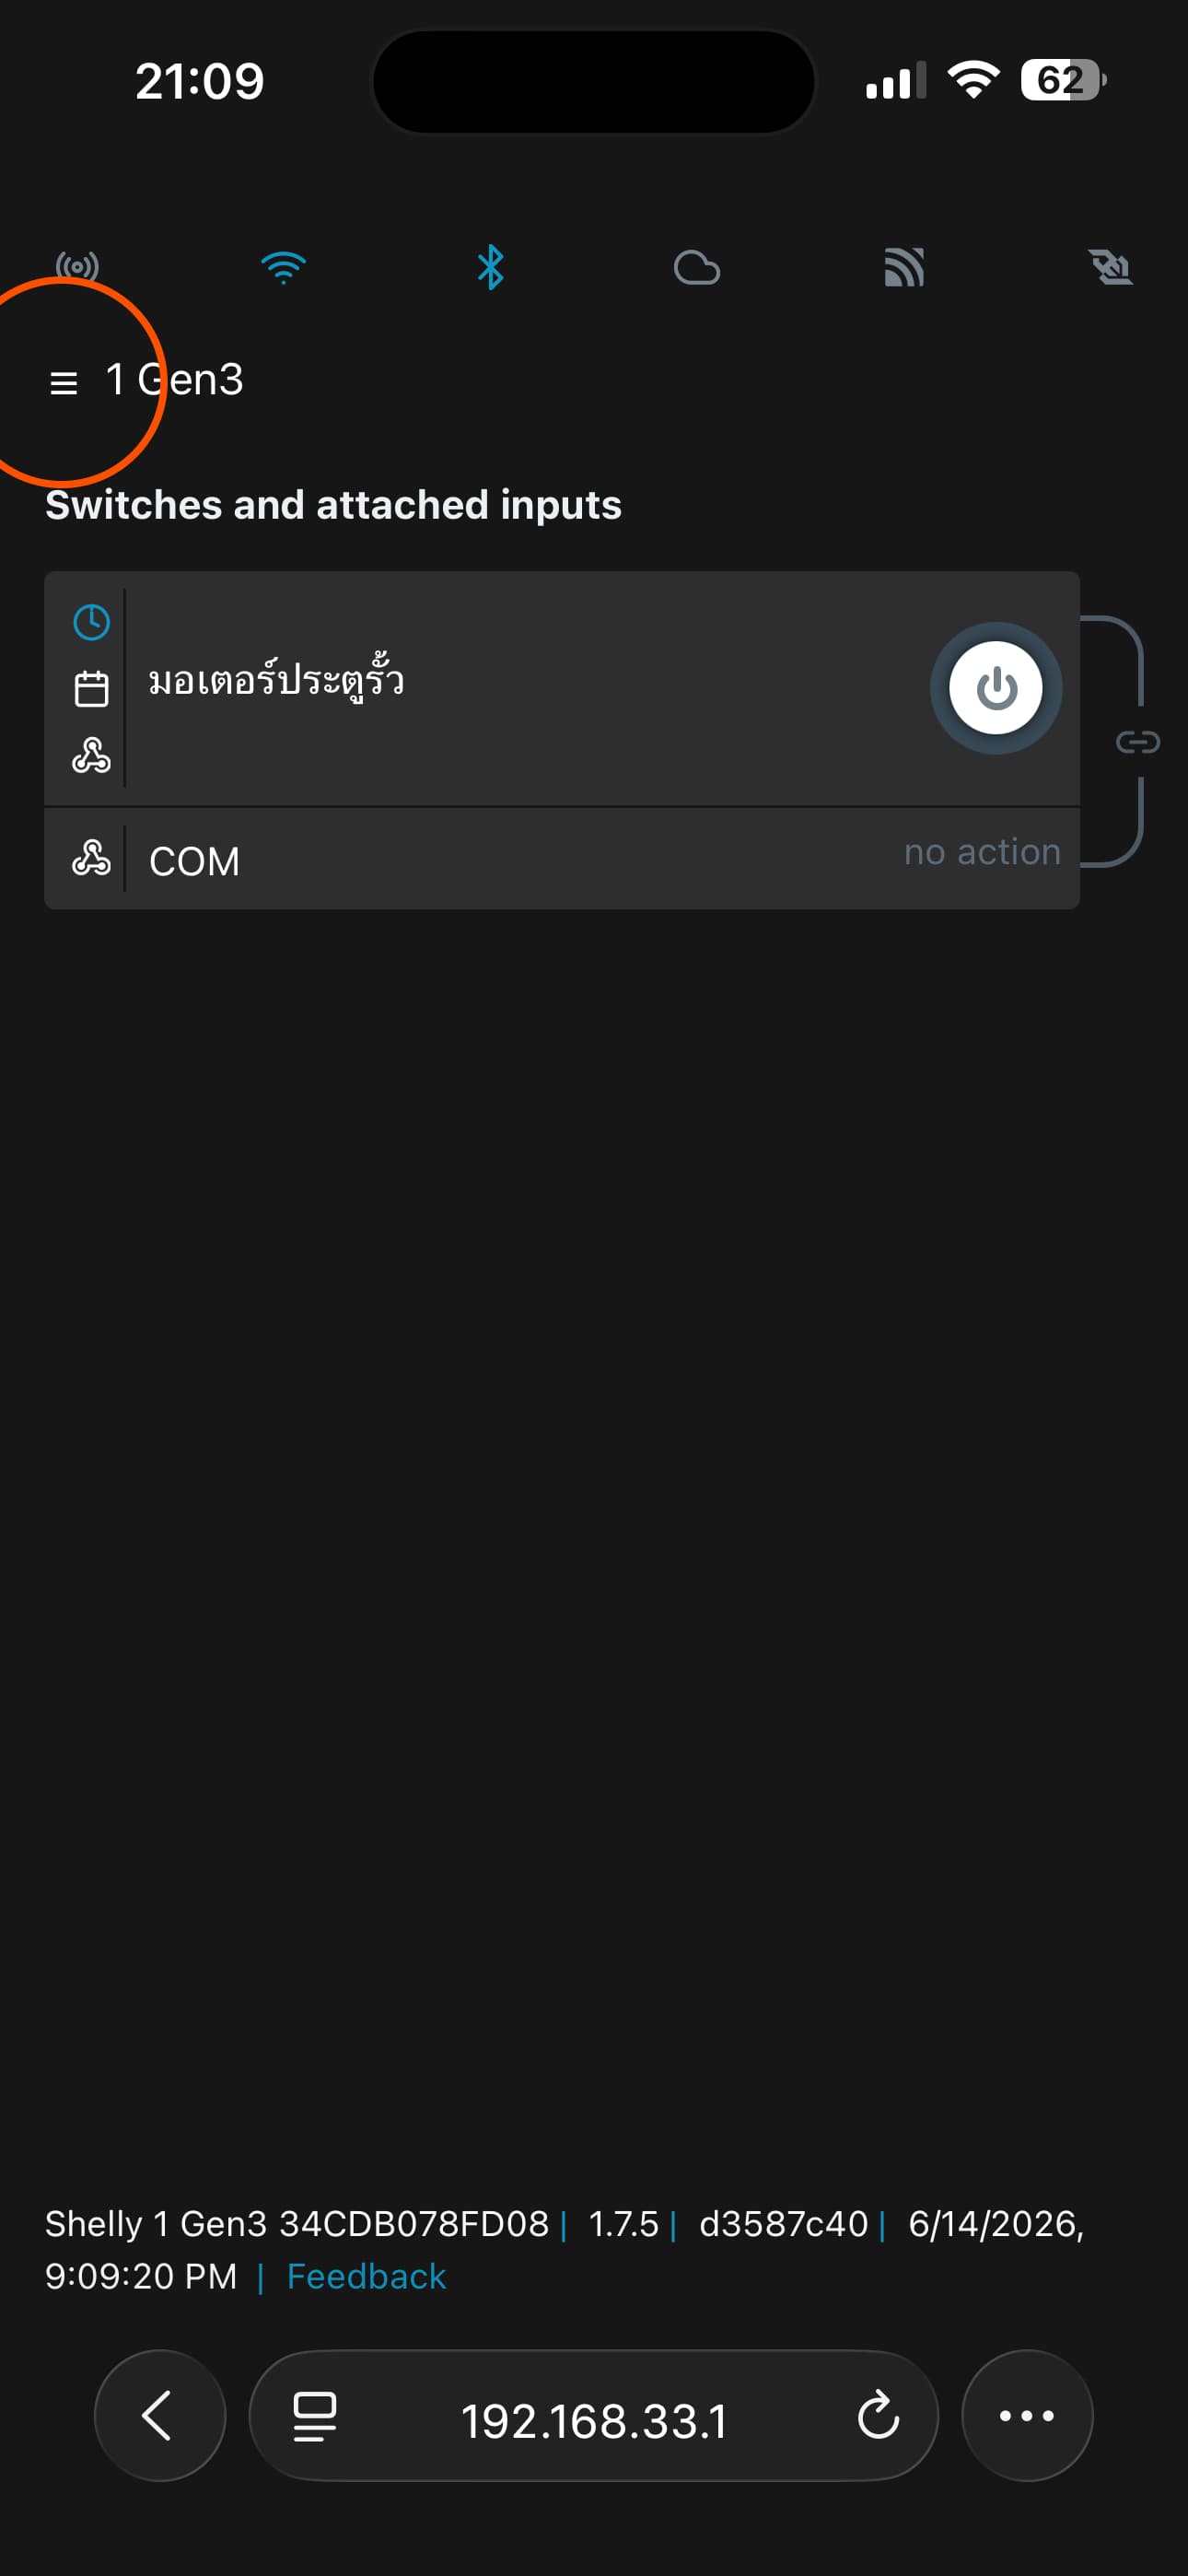
Set it to "press-and-release"
Go to Settings → Input/Output settings → set Input mode = Button · Output type = Momentary · Action on power on = Turn OFF
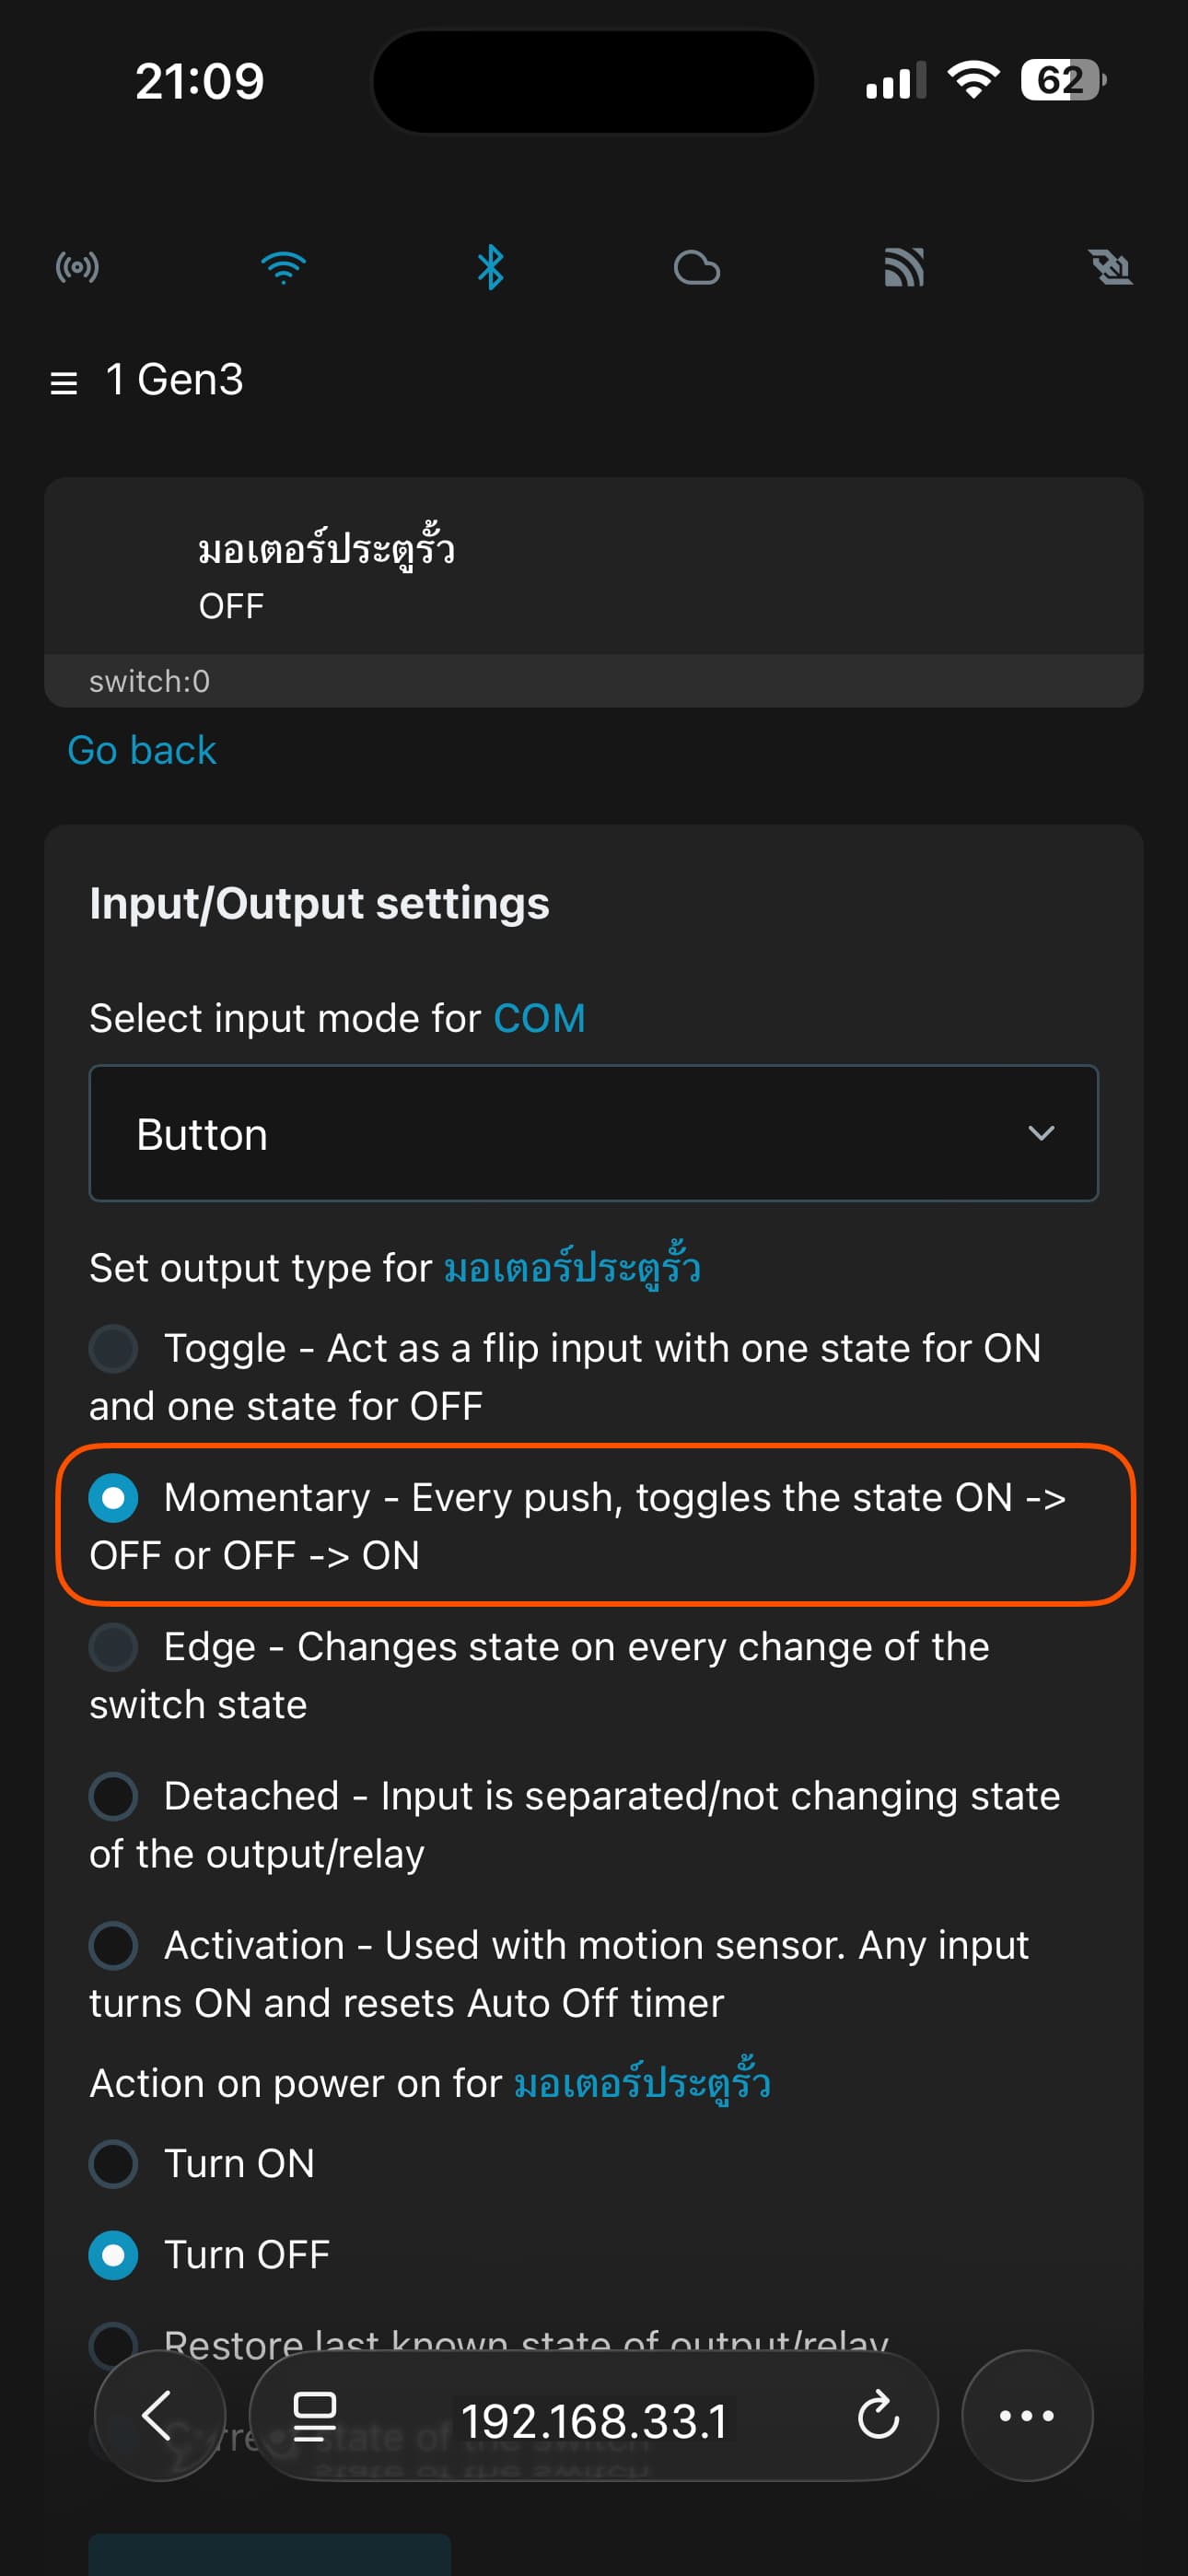
Keep the gate from hanging — the step you can't forget
Go to Automations → Timers tab → set Auto OFF = 1 second (Auto ON = 0) → Save
This is the heart of it: trigger → the circuit touches for just 1 second → cuts itself immediately · even if the signal drops after the trigger, the gate won't hang.
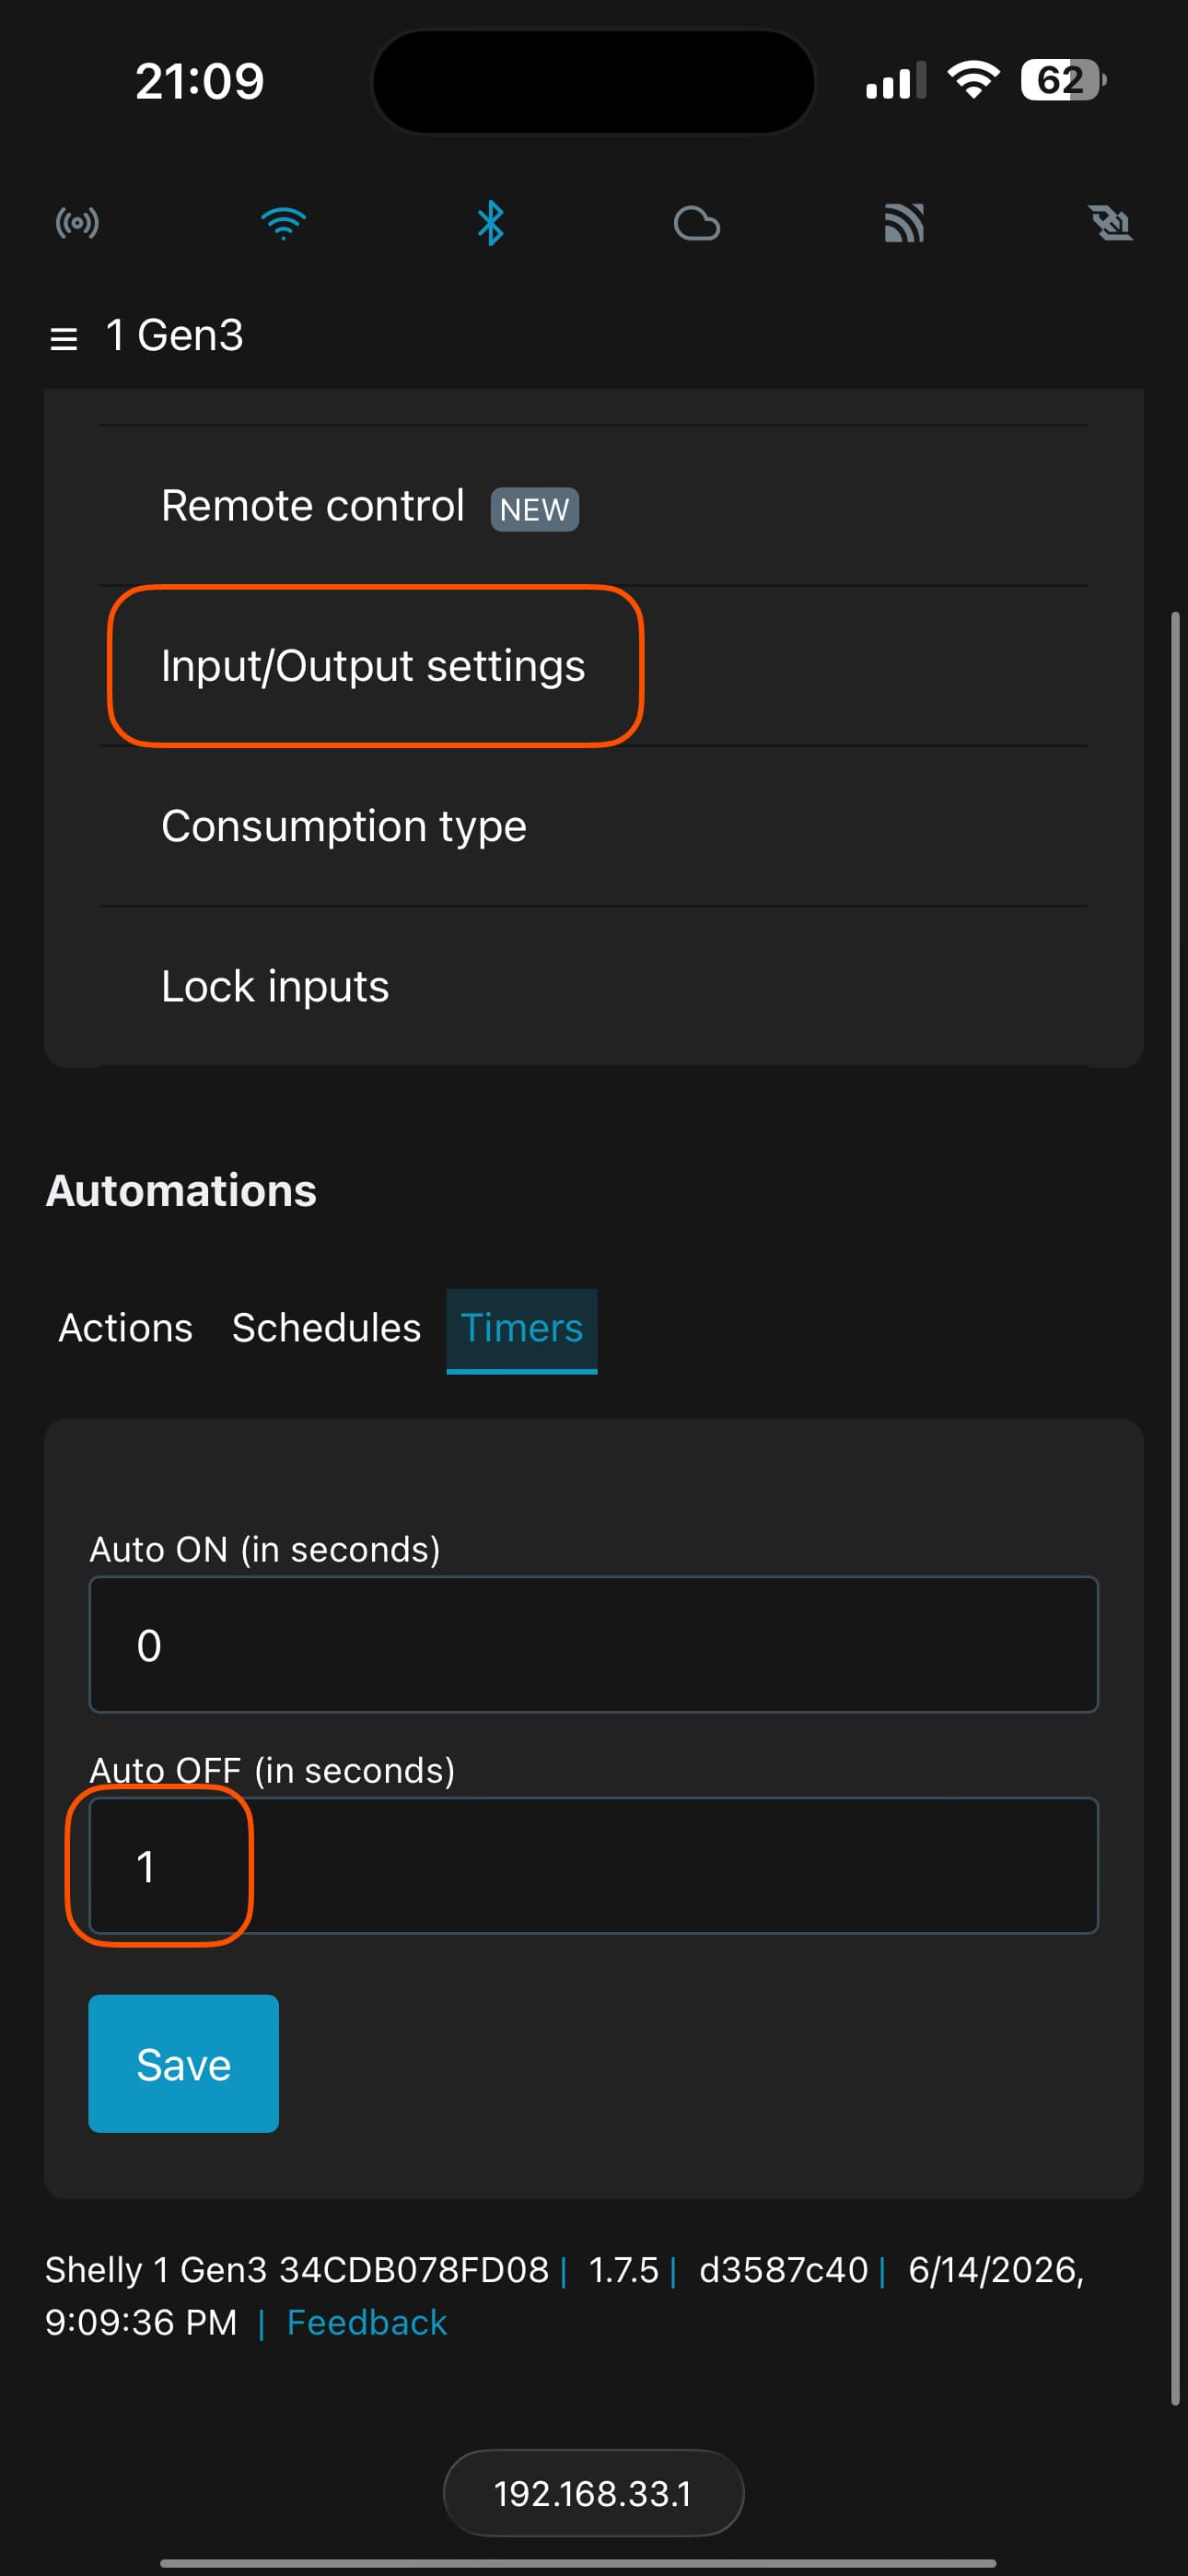
Paste the script you copied
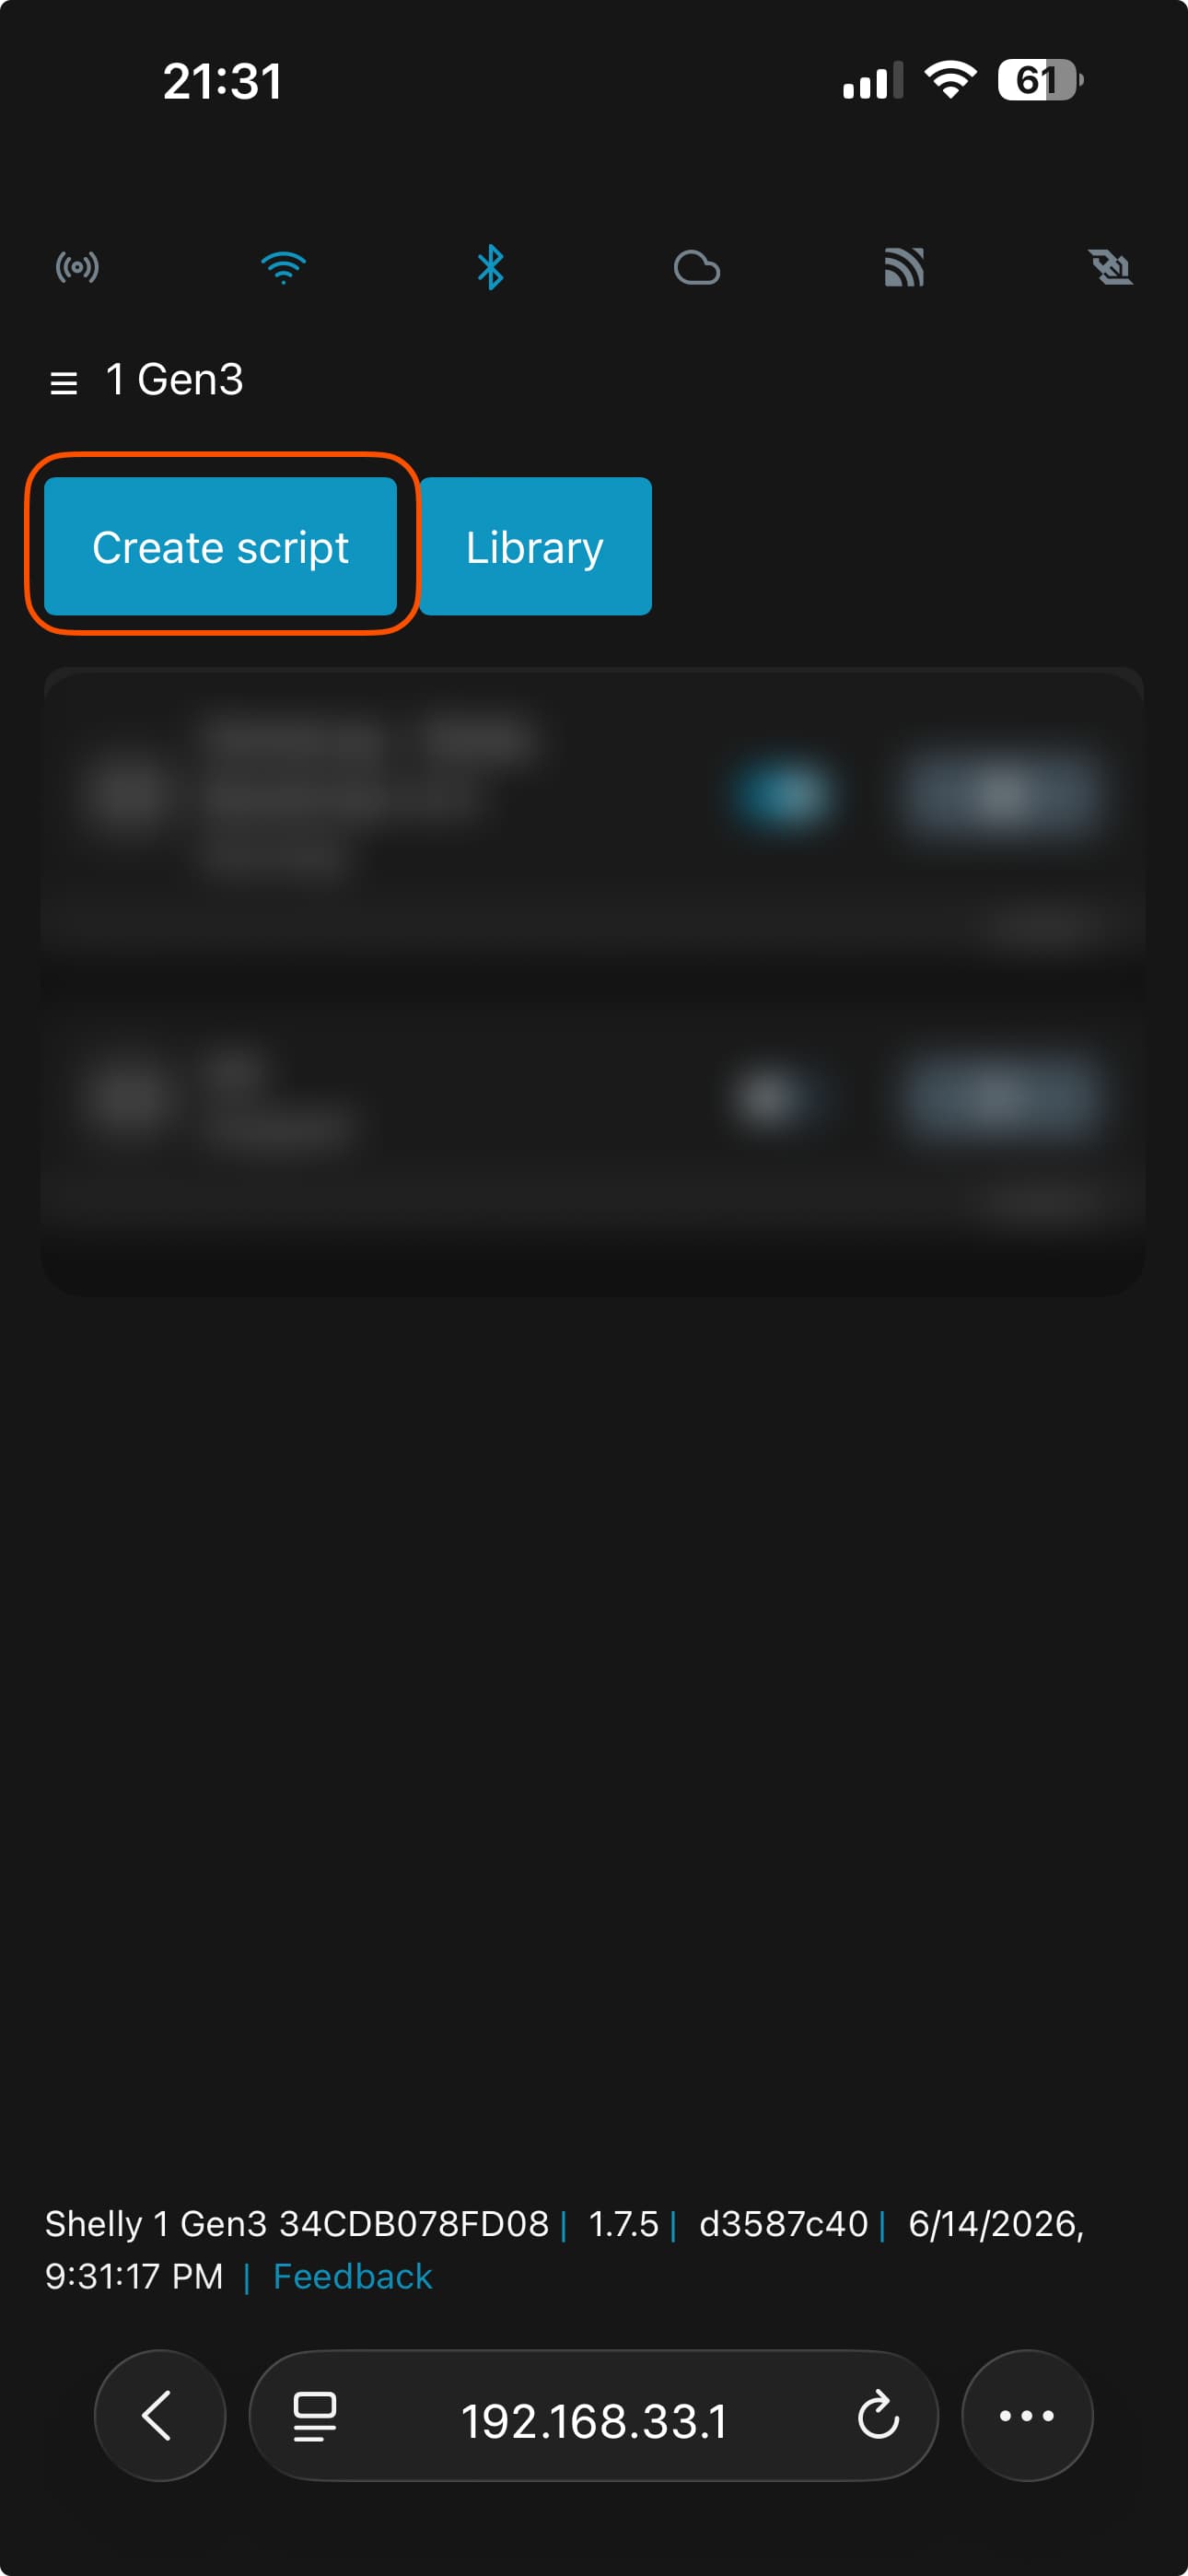
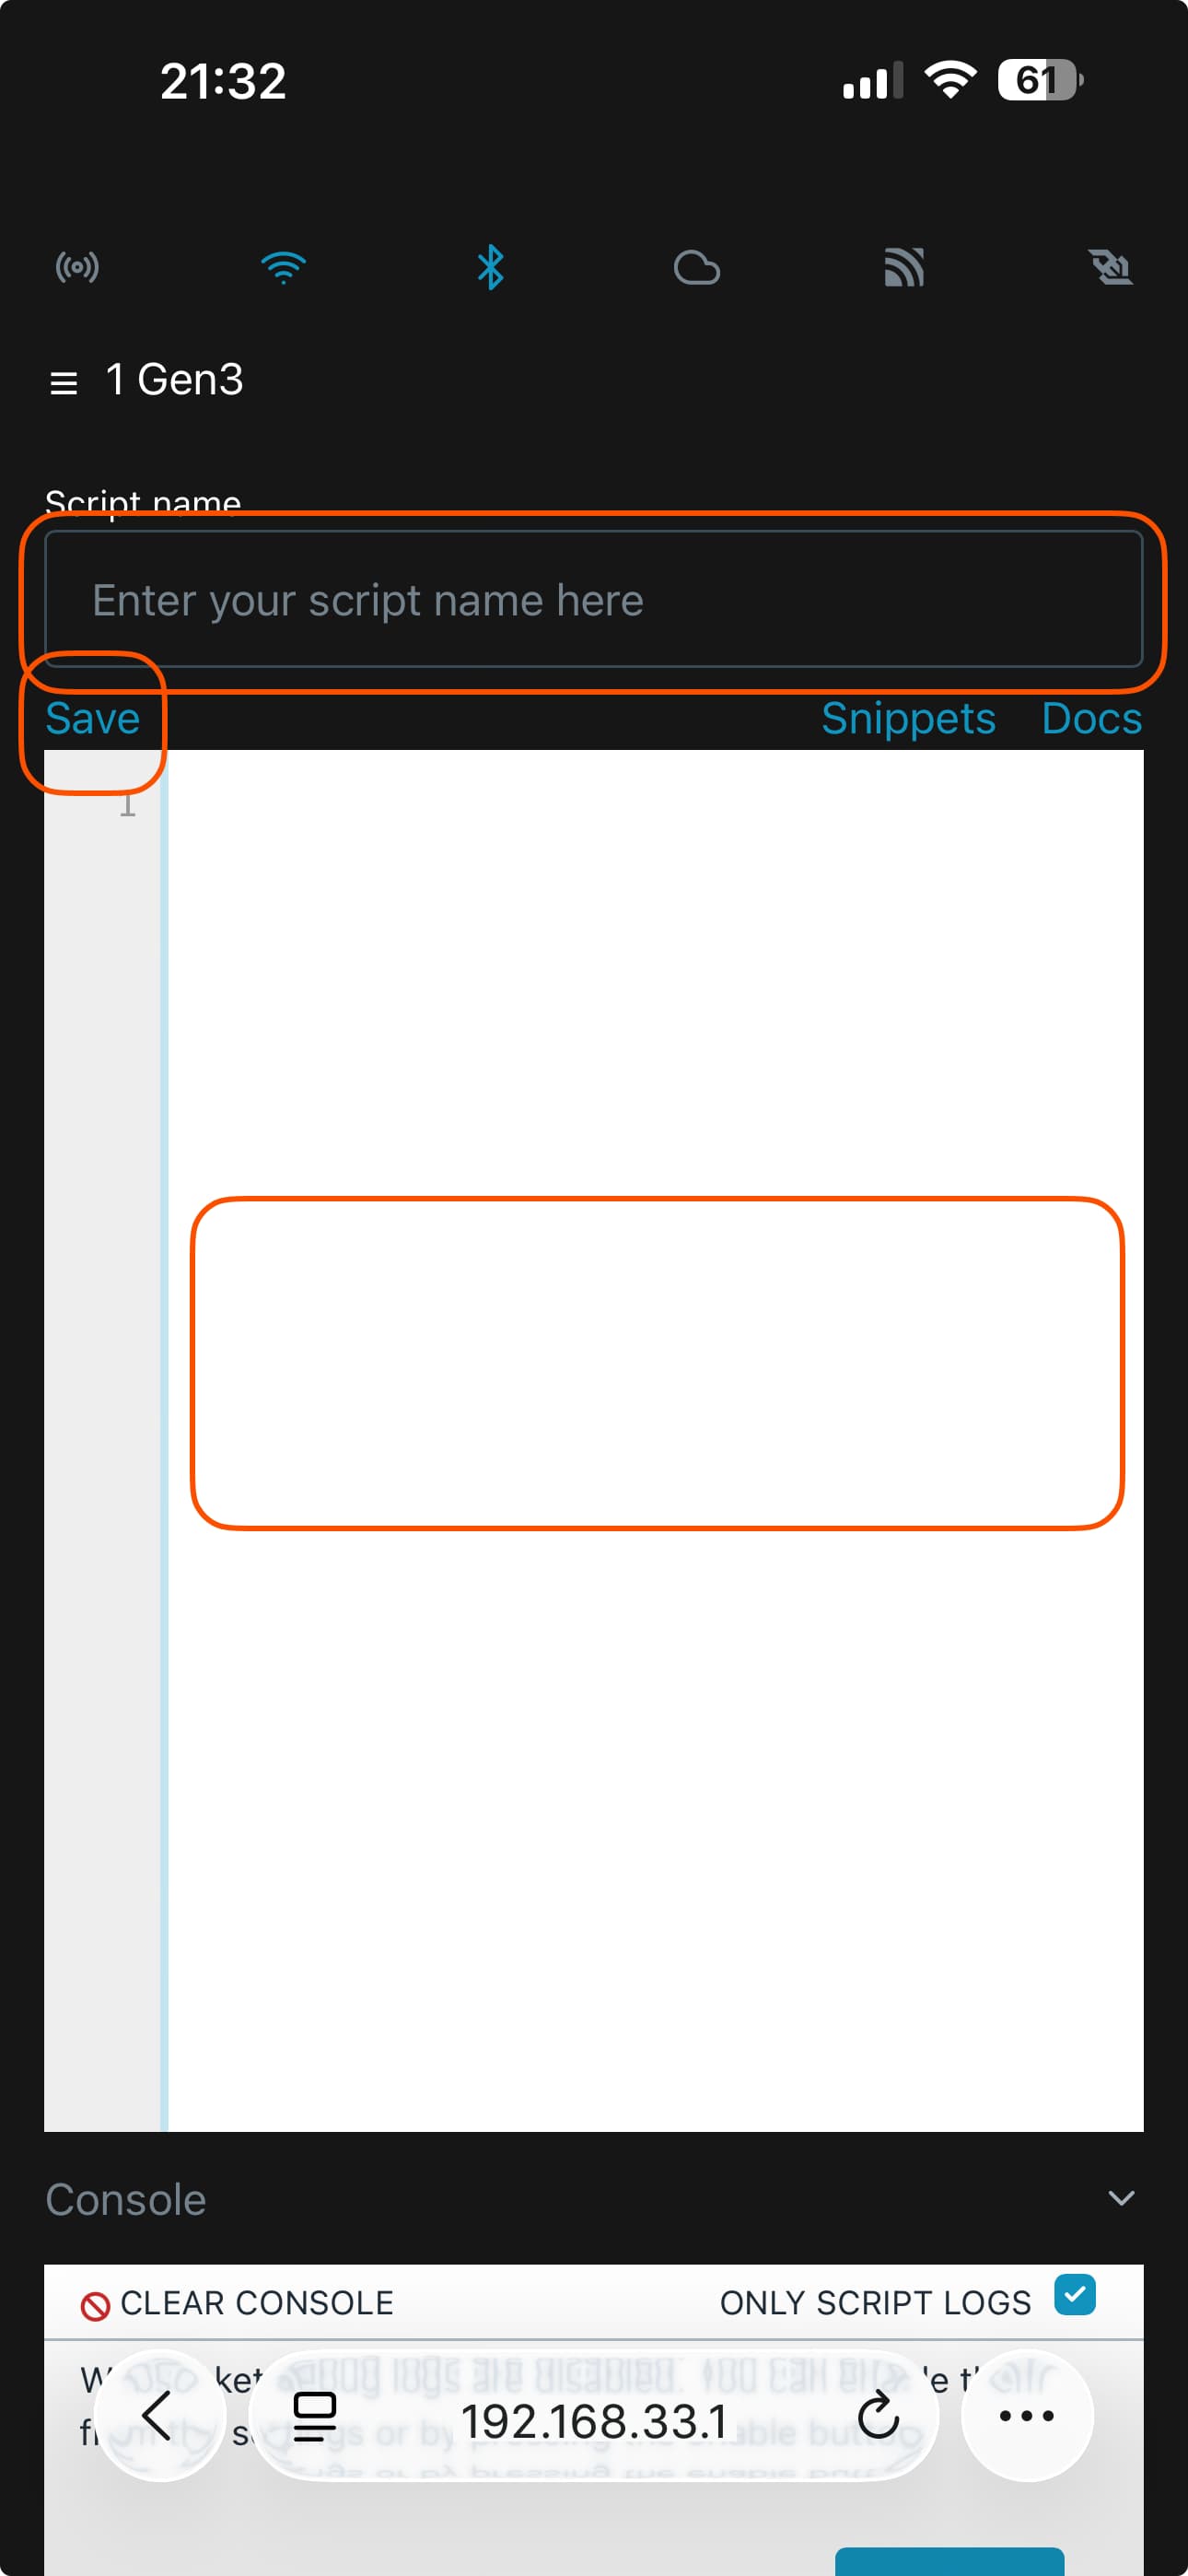
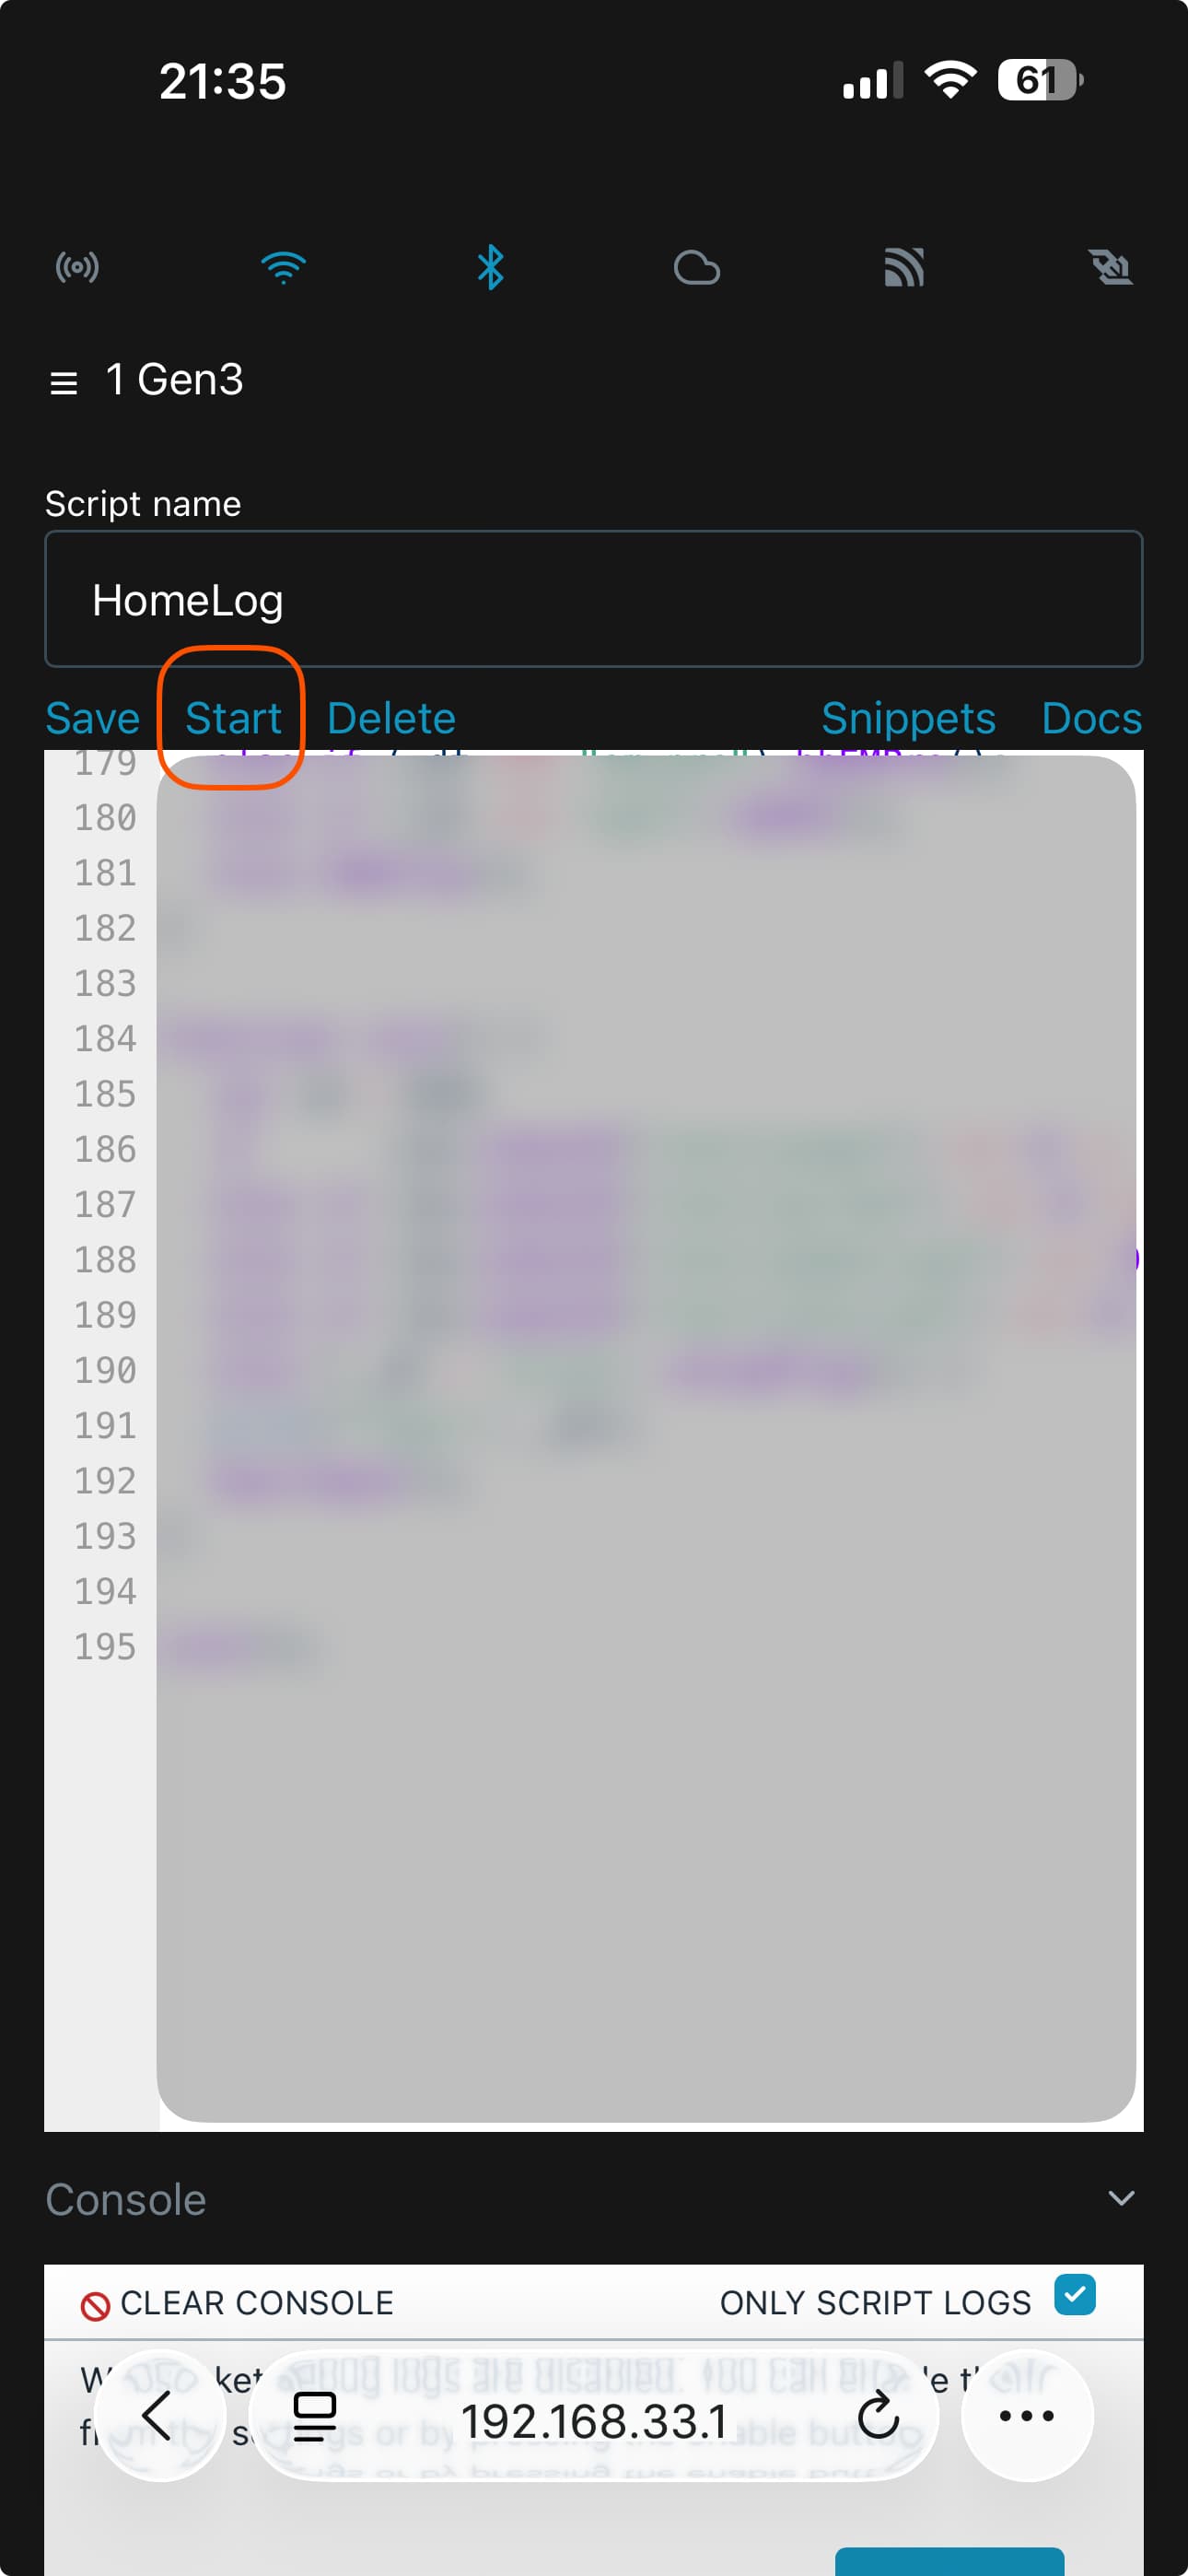
Open the menu (☰) → choose Scripts → tap Create script → paste the script you copied in phase 2 → name it HomeLog → tap Save → tap Start
This script is what lets the Shelly know HomeLog — once you Start it, it begins sending the signal that says "I'm online now".
Tell it your home Wi-Fi — the last step on the box
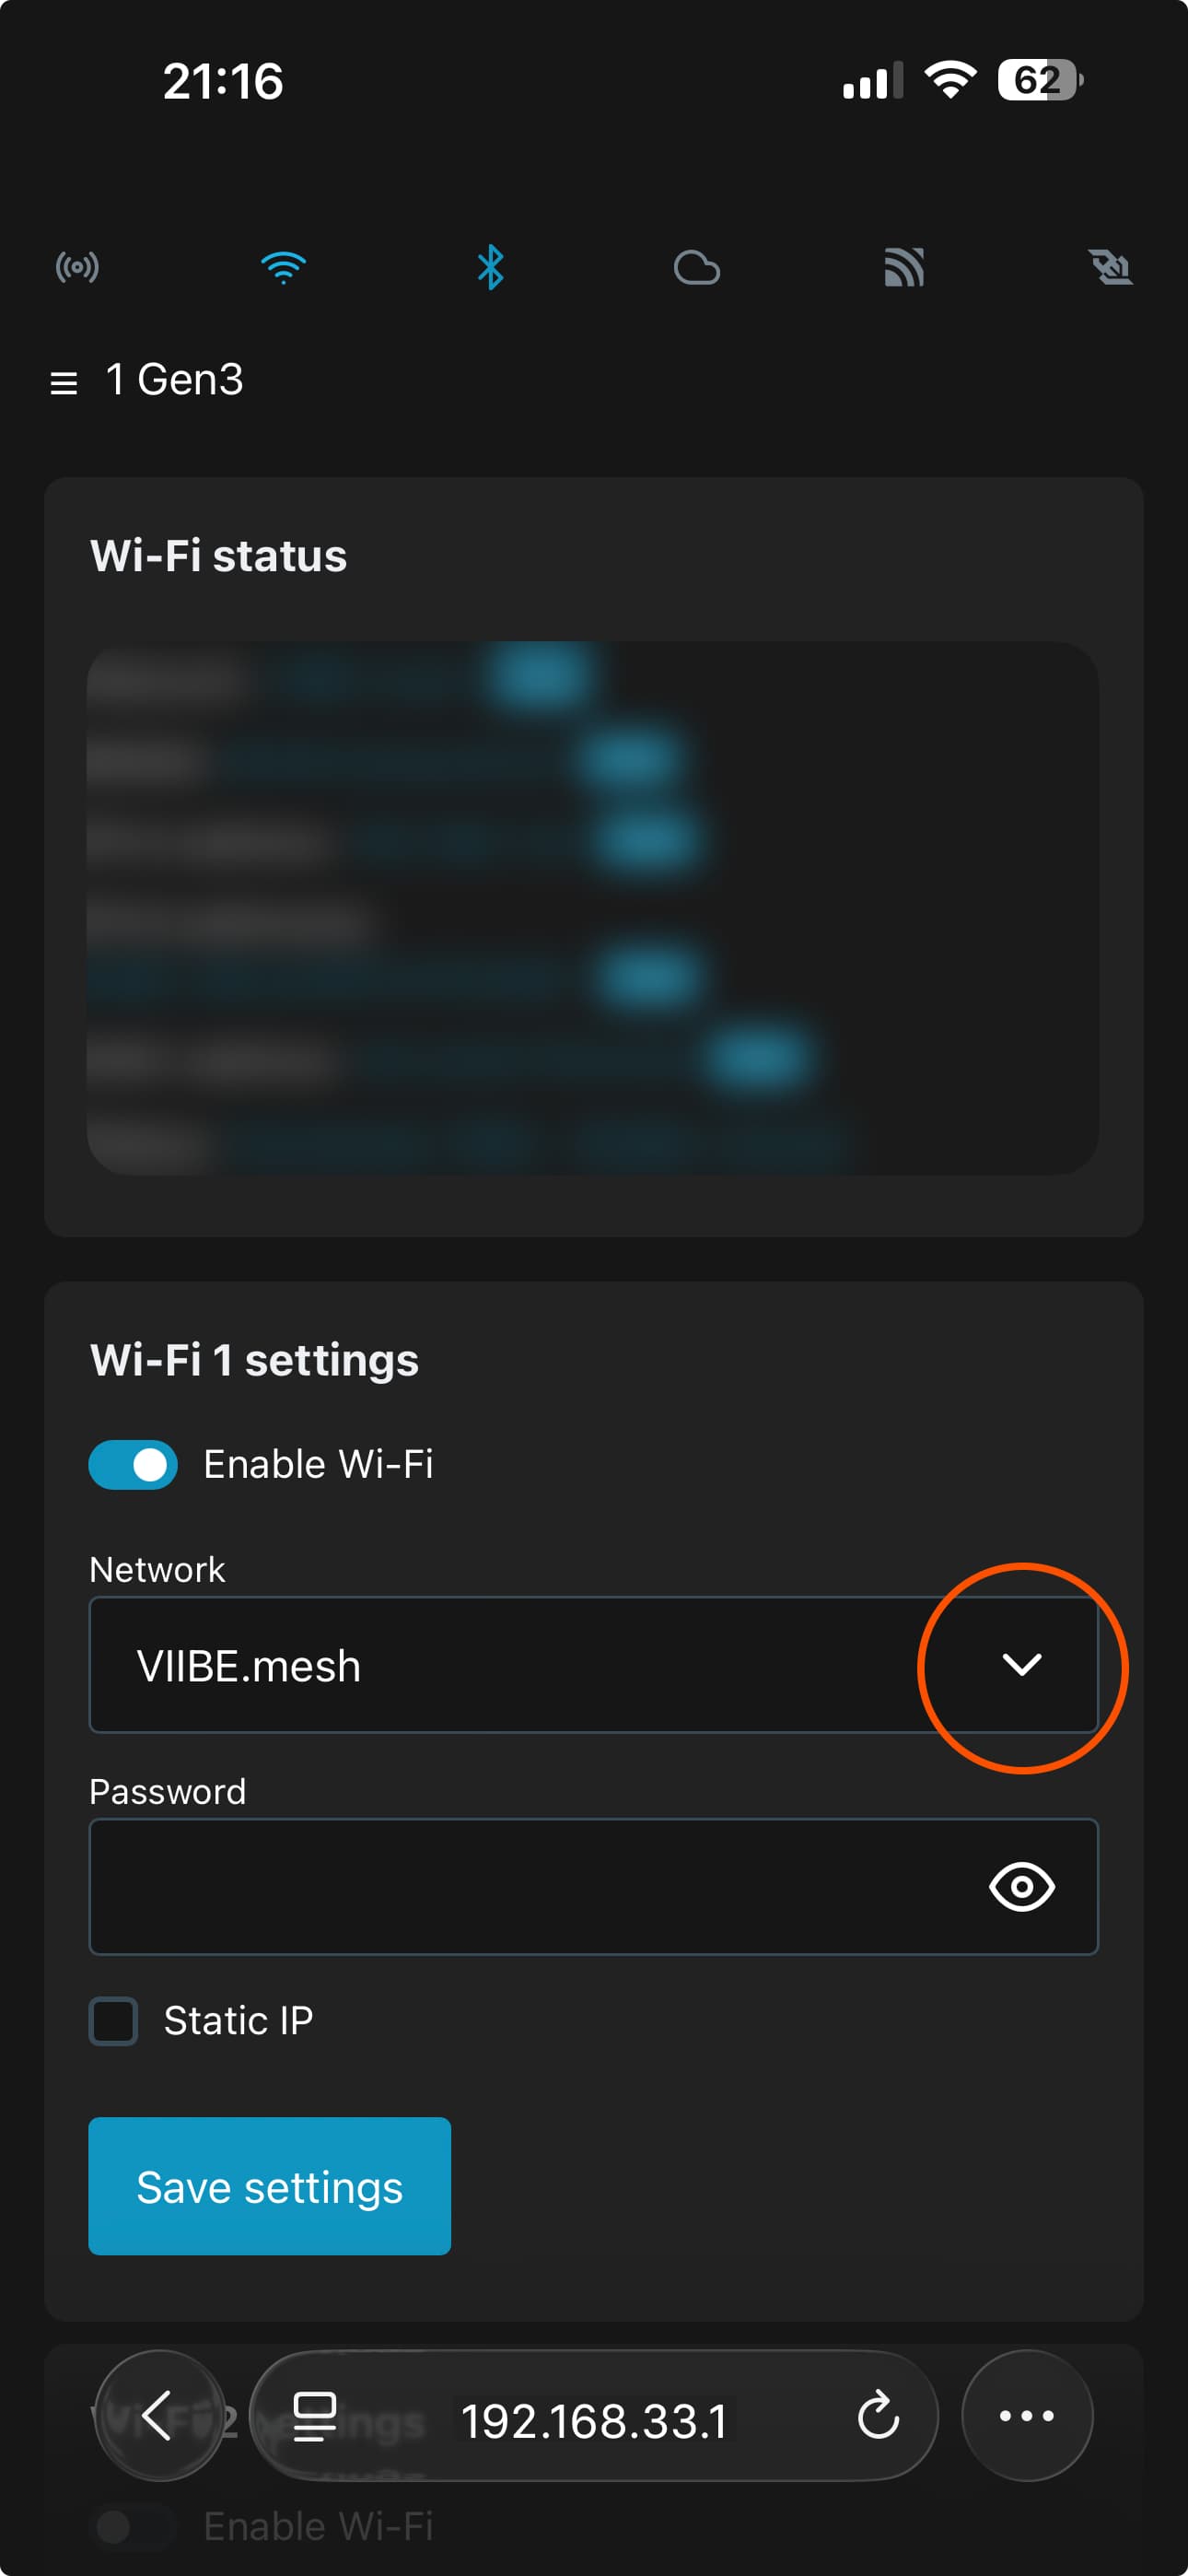
Go to Wi-Fi settings → enter your home Wi-Fi name and password → tap Save · the Shelly reboots right away to connect to your home Wi-Fi and come online on its own.
After this step, you never need to open the Shelly page again — head back to LINE to carry on.
Come back and use it in LINE
Switch your phone back to home Wi-Fi — and everything reconnects on its own here.
The device shows up on its own
→ Open LINE → go to the Add device page
→ the gate you just wired shows up on its own (no need to tap anything — it's the signal from the script)
→ give it a name with the word "gate" in it (e.g. "Front gate") — and the Open gate button appears on the space page on its own
![หน้าพื้นที่ใน LINE — ปุ่มเปิดประตู [ประตูแมว] + ประวัติการเข้าออกล่าสุด](/content/liff-space-page.jpg)
Not going as expected?
That's it — your home starts to remember you
Add HomeLog on LINE, then try driving home — your phone will ask you whether to open the gate.
From here, your home gradually learns who comes back and who goes out, and always asks you first, never doing more than you've allowed.
Add HomeLog on LINEHit a snag anywhere? Send it on the same LINE — we read every message.
Tested with the COMMANDO SL-FS 3.1 board + Shelly 1 Gen3
Most motor boards run on 220V mains (route 2) · 12V DC is a bonus on boards with a built-in battery (route 1)
⚠️ Shelly 1 Gen3 takes 12V DC / 24-48V DC / 110-240V AC only — 24V AC won't work